
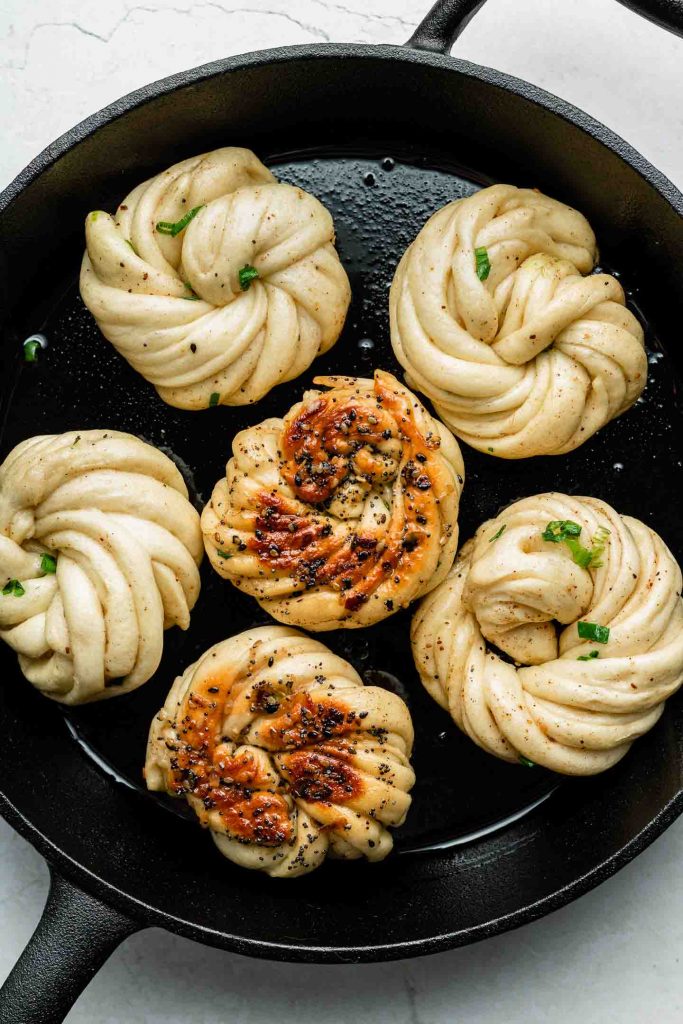
Scallion flower rolls (Hua Juan) are a variety Chinese steamed buns layered with a scallions, sesame oil and Chinese five spice. Pan fried with everything bagel seasoning for a delicious fusion of East Asian and Western flavours! (Vegan)

What are flower rolls / Huā Juǎn?
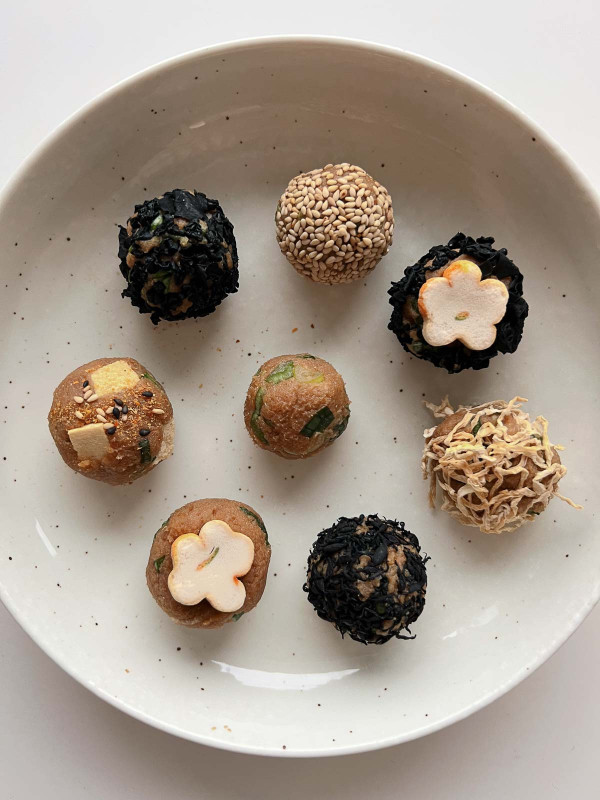
Flower rolls (Huā Juǎn in Chinese) are just one of many types of Chinese steamed buns. Instead of being stuffed, they’re layered with a flavourful sweet or savory filling! Black sesame seeds, sweet peanuts, scallions, sesame oil are just some of the different types flavours you might come across. These are often served for breakfast or a side dish to accompany main meals. They’re soft, fluffy and can either be steamed or pan fried for a delicious crispy bottom.
Today, I’ll be sharing a savory scallion version… with a everything bagel crusted bottom! Inspired by my Chinese background and where I was raised (Canada!), these delicious buns are a fusion of East Asian and Western flavours. One of my favourite breakfast treats growing up were everything bagels from Tim Hortons with chive cream cheese– and because chives are quite similar in flavour this combination came out so incredibly delicious! I’m super excited to share these buns!! Let’s get to it shall we?
How to make pan fried scallions buns
The Ingredients
- Low gluten flour: I like to use a combination of all purpose flour and wheat starch. Sometimes I’ll also use bao flour for convenience. Either option works perfect for this recipe.
- Instant yeast + baking powder: the combination of the two makes these extra soft and fluffy.
- Sugar: adds a touch of sweetness.
- Soy Milk: helps with the softness of the buns.
- Chinese five spice powder: this bend of spices give so much flavour to the buns, don’t skip on it!
- Scallions
- Sesame Oil: for brushing the buns inside and on the bottom.
- Everything Bagel Seasoning: store bought or homemade.
- Salt: for extra flavour.
The directions
The dough: can be prepared with a stand mix or with with your hands and a bowl.
If using a stand mix: Add all dry ingredients to stand mix, keeping the salt on one side of the bowl and the yeast on the other. When salt comes into contact with yeast, it may destroy the yeast. Lock your stand mix and turn it onto speed #2. Steadily and slowly pour in 120ml of soy milk. Increase the speed to setting #4 and let it run for 8-10 minutes or until a smooth dough comes together that is elastic-y. Depending on the flour you use and the kitchen humidity, add 1-2 tsp of extra soy milk as needed.
If using a hand mix: Add all dry ingredients to bowl, with the salt on one side of the bowl and the yeast on the other. Whisk the dry ingredients and then pour in lesser amount of soy milk (120 ml). Use chopsticks to mix and then once the dough gets shaggy, knead with your hands for 10-12 minutes or until a smooth elastic-y dough comes together. Depending on the flour you use and the kitchen humidity, add 1-2 tsp of extra soy milk as needed. Place it into a bowl and cover with a damp kitchen cloth for 10 minutes (this relaxes the dough).
Place it into a bowl and cover with a damp kitchen cloth for 10 minutes (this relaxes the dough). In the meantime, chop your scallions.
Assembling
- Roll the dough into a rectangle (about 1/4 inch in thickness and 8.5×10.5 in size) Brush with sesame oil, sprinkle with Chinese five spice, salt and scallions.
- Fold one side 1/3 towards the middle. Then fold the other side 1/3 towards the middle, pressing tightly. Cut the long rectangle into 6 pieces (about 58g each). Cover the dough with a damp kitchen cloth and work one piece at a time. Cut 4-6 slits per piece of dough, pinch the end and then twist. Then bring the cut end toward the middle to form a round shape (like a bagel), tucking the cut side down.
- Brush sesame oil on the bottom and generously dip it into everything bagel seasoning. Place in a steamer basket lined with parchment paper and proof for 45 minutes – 1 hour (or until 1.5 times larger in size / poke test).
Cooking
- Method #1: Add 2 tbsp of oil to a non-stick pan over medium heat. Place the buns in, leaving about 1 inch between each bun. Cook for until the bottom gets lightly browned (about 2-3 minutes). Then add 4-5 tbsp of water (depending on the size of the pan), cover and cook until the water is almost gone. Remove the lid and let it cook for another minute or until water is completely gone and bottom is golden brown to your liking and crispy again.
- Method #2: Line your pan with parchment paper and place buns on top. Cook for 2-3 minutes or until light golden brown. Add 4-5 tbsp of water UNDER the parchment paper, over and cook until the water is almost gone. Remove the lid and let it cook for another minute.
How to Store & Reheat
These are best served fresh out of the pan but they also freeze very well! Since this recipe makes 6 buns (perfect for 2-3 people), there shouldn’t be any left overs but if there are, I highly recommend freezing them once they have cooled to store to maintain their soft texture. Double the recipe to make 12 if you’d like to have some on hand! They’ll stay good for up to 1 month.
To reheat, steam for 8 minutes or until warmed again. If in a rush, wrap with damp paper towel and microwave for 1 minute. No need to defrost beforehand!
Serving
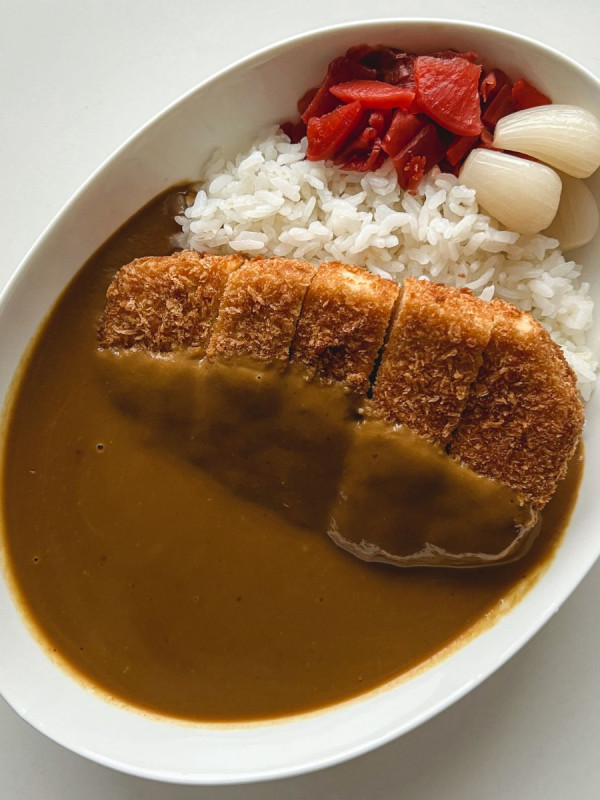
These scallion buns are perfect for any time of the day, really. I like to have them for breakfast with fresh soy milk, a snack with some tea and a little bit of misozuke, or as a side dish with a meal with something like rice porridges and congee.
Recipe notes + takeaways
- Using soy milk OR water: Because they both get absorbed differently, the amount will vary (also depending on the humidity of your room). You can also use a combination of soy milk and water of 80ml soy milk + 45ml water.
- Prevent over-proofing the dough: To test, poke one of the buns. It should spring back slowly. If it springs back quickly, proof for longer. If it does not spring back at all, dough is over proofed.
- Assembling: The method I shared is just one way to assemble the buns. You can also roll out each piece of cut dough into a oval shape, make slits, add the filling and then twist. Find which works better for you!
- Homemade everything bagel seasoning recipe: 1 tbsp white sesame seeds, 1 tbsp black sesame seeds, 1 tbsp minced garlic, 1 tbsp minced onion, 1 tbsp poppy seeds, 1/2 tbsp flaky sea salt.
More delicious buns to try:
- Vegan Sheng Jian Bao (Pan Fried Soup Dumplings)
- Vegan Char Siu Bao
- Yeast Free Stuffed Buns
- Steamed Black Sesame Red Bean Buns
- Pan Fried Curry Buns
- Easy Scallions Pancakes
If you recreate this Everything Bagel Crusted Scallions Buns recipe let me know how you liked it by leaving a comment and rating below or by tagging me on Instagram @Okonomikitchen, I love seeing all of your tasty recreations!
Hungry for more? Be sure to subscribe to my newsletter and follow along on Instagram, Youtube and Pinterest for more deliciousness!

Everything Bagel Crusted Scallion Buns
- Total Time: 30 minutes
- Yield: 6 buns 1x
Ingredients
- 200g low-gluten flour* (bao flour or 180g all purpose flour + 20g wheat starch)
- 1 tsp instant yeast (3g)
- 1 tsp baking powder (3g)
- 2 tsp cane sugar (11g)
- 1/4 tsp salt
- 120–125ml soy milk (or 100-110ml water)**
- 1/4 tsp Chinese five spice powder
- 1/2 tsp salt
- 1–2 scallions, finely chopped
- 1/2 tbsp sesame oil for brushing
- 3 tbsp everything bagel seasoning
Instructions
Dough
- Stand mix: Add ingredients to stand mix and start on low speed (#2). Pour in the milk and then increase speed to medium (#4), and let it run for about 8-10 minutes or until the dough comes together, is smooth and elastic-y. Take it out of the bowl, knead with your hands and form a smooth round ball. Allow the dough to rest for 10 minutes covered.
- Hand mix: Add all the dry ingredients to a bowl and whisk together. Use chopsticks to stir and slowly pour in the milk (or water). Once the dough gets shaggy, knead with your hands until dough comes together and is smooth (about 10-12 minutes). Form it into a ball and then allow the dough to rest for 10 minutes covered.
Assembly
- Take the dough out of the bowl and then using a rolling pin, roll it into a 8.5×10.5 inch rectangle (about 1/4 inch in thickness). Brush with sesame oil, sprinkle with Chinese five spice, salt and scallions.
- Fold one side 1/3 towards the middle. Then fold the other side 1/3 towards the middle, pressing tightly. Cut the long rectangle into 6 pieces (about 58g each). Cover the dough with a damp kitchen cloth and work one piece at a time. Cut 4-6 slits per piece of dough, pinch the end and then twist. Then bring the cut end toward the middle to form a round shape (like a bagel), tucking the cut side down. Brush sesame oil on the bottom and generously dip it into everything bagel seasoning. Place in a steamer basket lined with parchment paper and proof for 45 minutes – 1 hour (or until 1.5 times larger in size / poke test).
Cooking
- Add 2 tbsp of oil to a non-stick pan over medium heat. Place the buns in, leaving about 1 inch between each bun. Cook for until the bottom gets lightly browned (about 2-3 minutes). Then add 4-5 tbsp of water (depending on the size of the pan), cover and cook until the water is almost gone. Remove the lid and let it cook for another minute or until water is completely gone and bottom is golden brown to your liking and crispy again.
Notes
- *Low gluten flour can be bao flour or cake flour. If you do not have either, you can also just use plain all purpose flour or a combination of 180g all purpose flour + 20g wheat starch.
- ** Soy milk or water can either be used. Because they both get absorbed differently, the amount will vary (also depending on the humidity of your room). You can also use a combination of soy milk and water of 80ml soy milk + 45ml water.
- Poke test: DO NOT over-proof your dough. To test, poke one of the buns. It should spring back slowly. If it springs back quickly, proof for longer. If it does not spring back at all, dough is over proofed.
- Helpful Equipment: electric stand mix, pastry brush, dough cutter/scrapper, steaming basket, non-stick skillet with lid
- Nutritional Information Disclaimer: Nutrition information is a rough estimate calculated on an online tool (Cronometer).
- Time: Prep time does not include proof time.
- Prep Time: 15 minutes
- Cook Time: 12 minutes
- Category: side dish
- Method: stove top
- Cuisine: chinese, vegan
Nutrition
- Serving Size: 1 serving
SAVE IT FOR LATER! ↓
Okonomi Kitchen is a participant in the Amazon Services LLC Associates Program. When you purchase something through my amazon affiliate links, I earn a small commission that helps me produce consistent content at no cost to you. Thank you for supporting my plant based kitchen!


I used garam masala instead of Chinese five spices as I couldn’t find these hahah but it was still amazing!! The texture of fluff and the crispness… so good!
THE best bagels I’ve ever made!!! So simple to make and so delicious!! I love them and my family too, and definitely will make them again!
Love from Buenos Aires, Argentina ❤️
Very nyummy!,
Quite simple recipe.
Nice texture and looks ‘PRETTY’ too ❤️
Will do more!,,
Everyone in the house loves it!
Omg seriously the best buns ever and sooo versatile!! I tried it with oat milk instead of soy because that’s what I had on hand and it still worked out really well. You are a genius!!
Definitely had to try these the moment I saw them on your instagram page, because I just love bagels and fluffy buns like Banh Bao. They were easy to make and the everything bagel seasoning gave it that real nice bagel taste. The combination of the fluffy, soft top and the cripsy bottom was so satisfying! Will make them again and experiment with other flavors as well because my imagination has been widened.
I made this recipe today, they were absolutely delicious. I added some red pepper and garlic to the filling.
The cloudlike texture was exactly what I was needing in a rainy Sunday. Thank you Lisa for sharing, I would definitely do this recipe again. <3
The huajuan were wo so fun and easy to make, the IG video really helped me for the twisting part. Personally, I had to had a little more water and needed more time, but the result was worth all the effort, it was delicious!
100% recommended
These were amazing. Our first time making steamed buns and they turned out perfectly! Highly recommend referencing Lisa’s instagram reel to get the forming/pattern right.
A M A Z I N G. For one…super delish. Two…super easy to make. Finally…the filling possibilities are literally endless from this point. For a quick visual on the how to, check out the Instagram. I suggest doubling the recipe. It is just too good.