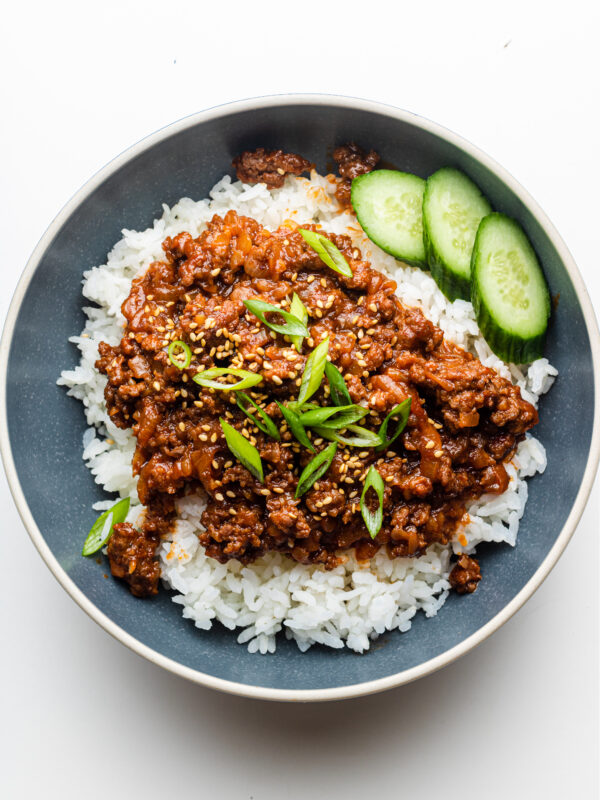
This Chicken Bulgogi recipe features tender chicken marinated in a flavorful Korean BBQ sauce with sweet and spicy notes. It’s quick and easy to prepare, making it ideal for a delicious weeknight dinner or a tasty BBQ. Serve with rice and your favorite veggies for a complete meal.

Table of Contents
Chicken Bulgogi (Korean BBQ Chicken)
Chicken Bulgogi is a Korean dish consisting of marinated chicken that is grilled or stir-fried. The chicken is typically marinated in a mixture of soy sauce, sugar, sesame oil, garlic, ginger, and often pear or apple for sweetness and tenderness. The result is a flavorful, sweet, and savory dish with a slightly spicy kick, often served with rice, vegetables, and sometimes lettuce leaves for wrapping. It’s a popular and versatile dish that embodies the classic flavors of Korean BBQ.
Ingredients
Here is everything you need to make flavourful chicken bulgogi:
- Chicken thighs: Tender and juicy cuts ideal for absorbing flavors in Chicken Bulgogi.
- Soy sauce: Adds savory umami flavor to the marinade.
- Sake: Enhances depth of flavor with a subtle rice wine note.
- Mirin: Sweet rice wine that balances the savory and sweet components of the marinade.
- Sesame oil: Provides nutty aroma and richness to the marinade.
- Brown sugar: Adds sweetness and caramelization during cooking.
- Honey or oligodang: Optional sweetener for extra depth and glaze.
- Apple, grated: Natural sweetness that tenderizes the chicken.
- Garlic: Adds robust, aromatic garlic flavor to the marinade.
- Ginger: Infuses bright, spicy notes into the marinade.
- Black pepper: Adds a hint of heat and depth to the marinade.
How to Make Chicken Bulgogi
Chicken bulgogi can be cooked in multiple different ways! During the summer we like to cook it on the grill but the air fryer and oven also work really well.
Air Fryer Method: Preheat the air fryer to 375°F (190°C) and lightly spray the basket with oil. Cook the marinated chicken in a single layer for 12-15 minutes, flipping halfway through, until fully cooked and crispy. Let rest before serving.
Oven Baked + Broil Method: Preheat the oven to 400°F (200°C) and line a baking sheet with foil. Bake the marinated chicken in a single layer for 20-25 minutes until fully cooked, then broil on high for 2-3 minutes until caramelized. Let rest before serving.
Grill Method: Preheat the grill to medium-high heat and oil the grates. Grill the marinated chicken for 5-7 minutes on each side until fully cooked and charred. Optionally baste with extra marinade, let rest, and then slice thinly before serving.
Stove Top Method: Heat a skillet over medium-high heat with a bit of oil. Cook the marinated chicken in batches for 3-4 minutes on each side until fully cooked and caramelized. Let rest before serving. Optionally, boil and reduce the leftover marinade for a sauce.
Lisa’s Recipe Tips
- Marinate Overnight: For maximum flavor, marinate the chicken for at least 2-4 hours, but overnight is best. This allows the flavors to fully penetrate the meat.
- Grate a Pear or Apple: Adding grated pear or apple to the marinade helps tenderize the chicken and adds a subtle sweetness that complements the savory elements.
- High Heat for Searing: When cooking on the stovetop or grill, use high heat to quickly sear the chicken, creating a delicious caramelized crust.
- Avoid Overcrowding: Whether you’re using a skillet, air fryer, or baking sheet, avoid overcrowding to ensure even cooking and proper browning.
- Reduce the Marinade: After marinating the chicken, boil and reduce the leftover marinade into a sauce for drizzling over the cooked chicken, adding extra flavor.
Serving Suggestions
Here are some delicious serving suggestions for Chicken Bulgogi:
- Cooked Rice: Serve Chicken Bulgogi over a bed of fluffy steamed rice to soak up the delicious marinade.
- Lettuce Wraps: Wrap the Chicken Bulgogi in fresh, crisp lettuce leaves for a lighter, refreshing option. Add some ssamjang or doenjang for added flavour!
- Kimchi: Enjoy the tangy and spicy flavors of kimchi as a traditional Korean side dish that complements the savory Chicken Bulgogi.
- Stir-Fried Vegetables: Pair with stir-fried vegetables such as bell peppers, onions, and mushrooms for a complete meal.
- Salad: We love adding chicken bulgogi over fresh salad. The marinade and flavourful chicken acts as a sauce so no additional dressing is needed.
- Noodles: Not traditional at all, but it’s also super delicious
- Sandwiches: It’s SO good in sandwiches, just like my bulgogi egg bagel sandwich! Add some pickled vegetables for some crunch and tanginess.
How to Store Chicken Bulgogi
Refrigeration: Allow the cooked Chicken Bulgogi to cool to room temperature. Transfer it to an airtight container or wrap it tightly with plastic wrap. Refrigerate promptly within 2 hours of cooking. Properly stored, it can last in the refrigerator for up to 3-4 days.
Freezing: For longer storage, you can freeze Chicken Bulgogi. Allow it to cool completely before transferring it to a freezer-safe container or resealable freezer bags. Remove as much air as possible to prevent freezer burn. Properly frozen, Chicken Bulgogi can last in the freezer for up to 3 months.
Thawing: When ready to eat, thaw frozen Chicken Bulgogi overnight in the refrigerator. You can reheat it in a skillet over medium heat until warmed through or use a microwave.
FAQ
Yes, you can use chicken breast instead of thighs. However, chicken thighs are preferred for their juiciness and flavor.
Yes, you can freeze the marinated chicken. Place it in a freezer-safe bag or container and freeze for up to 3 months. Thaw in the refrigerator before cooking.
Yes, you can cook the leftover marinade by bringing it to a boil, then simmering until it reduces and thickens.
The traditional marinade for Chicken Bulgogi is not very spicy. However, you can add red pepper flakes or gochujang (Korean chili paste) to the marinade for a spicier version.
Enjoy!! If you make this Chicken Bulgogi recipe, let me know! Leave a comment, rating and if you decide to share it on socials, tag me on instagram @Okonomikitchen. I’d love to hear from you!
Print
Chicken Bulgogi
- Total Time: 2 hours 15 minutes
- Yield: 6 servings 1x
- Diet: Low Fat
Description
This Chicken Bulgogi recipe features tender chicken marinated in a flavorful Korean BBQ sauce with sweet and spicy notes. It’s quick and easy to prepare, making it ideal for a delicious weeknight dinner or a tasty BBQ. Serve with rice and your favorite veggies for a complete meal.
Ingredients
Chicken Bulgogi
- 2 lbs boneless skinless chicken thigh
- 6 tbsp soy sauce
- 1 tbsp sake
- 2 tbsp mirin
- 1 tbsp sesame oil
- 2 tbsp brown sugar
- 2 tbsp honey or oligodang
- 1/2 small apple, grated (or extra 1 tbsp brown sugar)
- 3–4 tbsp minced garlic
- 2 tsp grated ginger
- 1/4 tsp of back pepper
For serving
- sesame seeds
- scallions
- rice
- lettuce
Instructions
Marinating the Chicken:
- In a large bowl or ziplock bag, combine soy sauce, sake, mirin, sesame oil, brown sugar, honey, apple, garlic, ginger and black pepper. Mix well until the sugar is dissolved.
- Add the chicken thighs to the marinade, ensuring all pieces are well-coated.
- Cover and refrigerate for at least 30 minutes, preferably 2-4 hours, or overnight for maximum flavour.
Air Fryer Method:
- Preheat the air fryer to 375°F (190°C).
- Lightly spray the air fryer basket with oil.
- Place the marinated chicken pieces in a single layer in the basket.
- Cook for 12-15 minutes, flipping halfway through, until the chicken is fully cooked and slightly crispy.
- Remove and let rest for a few minutes before serving.
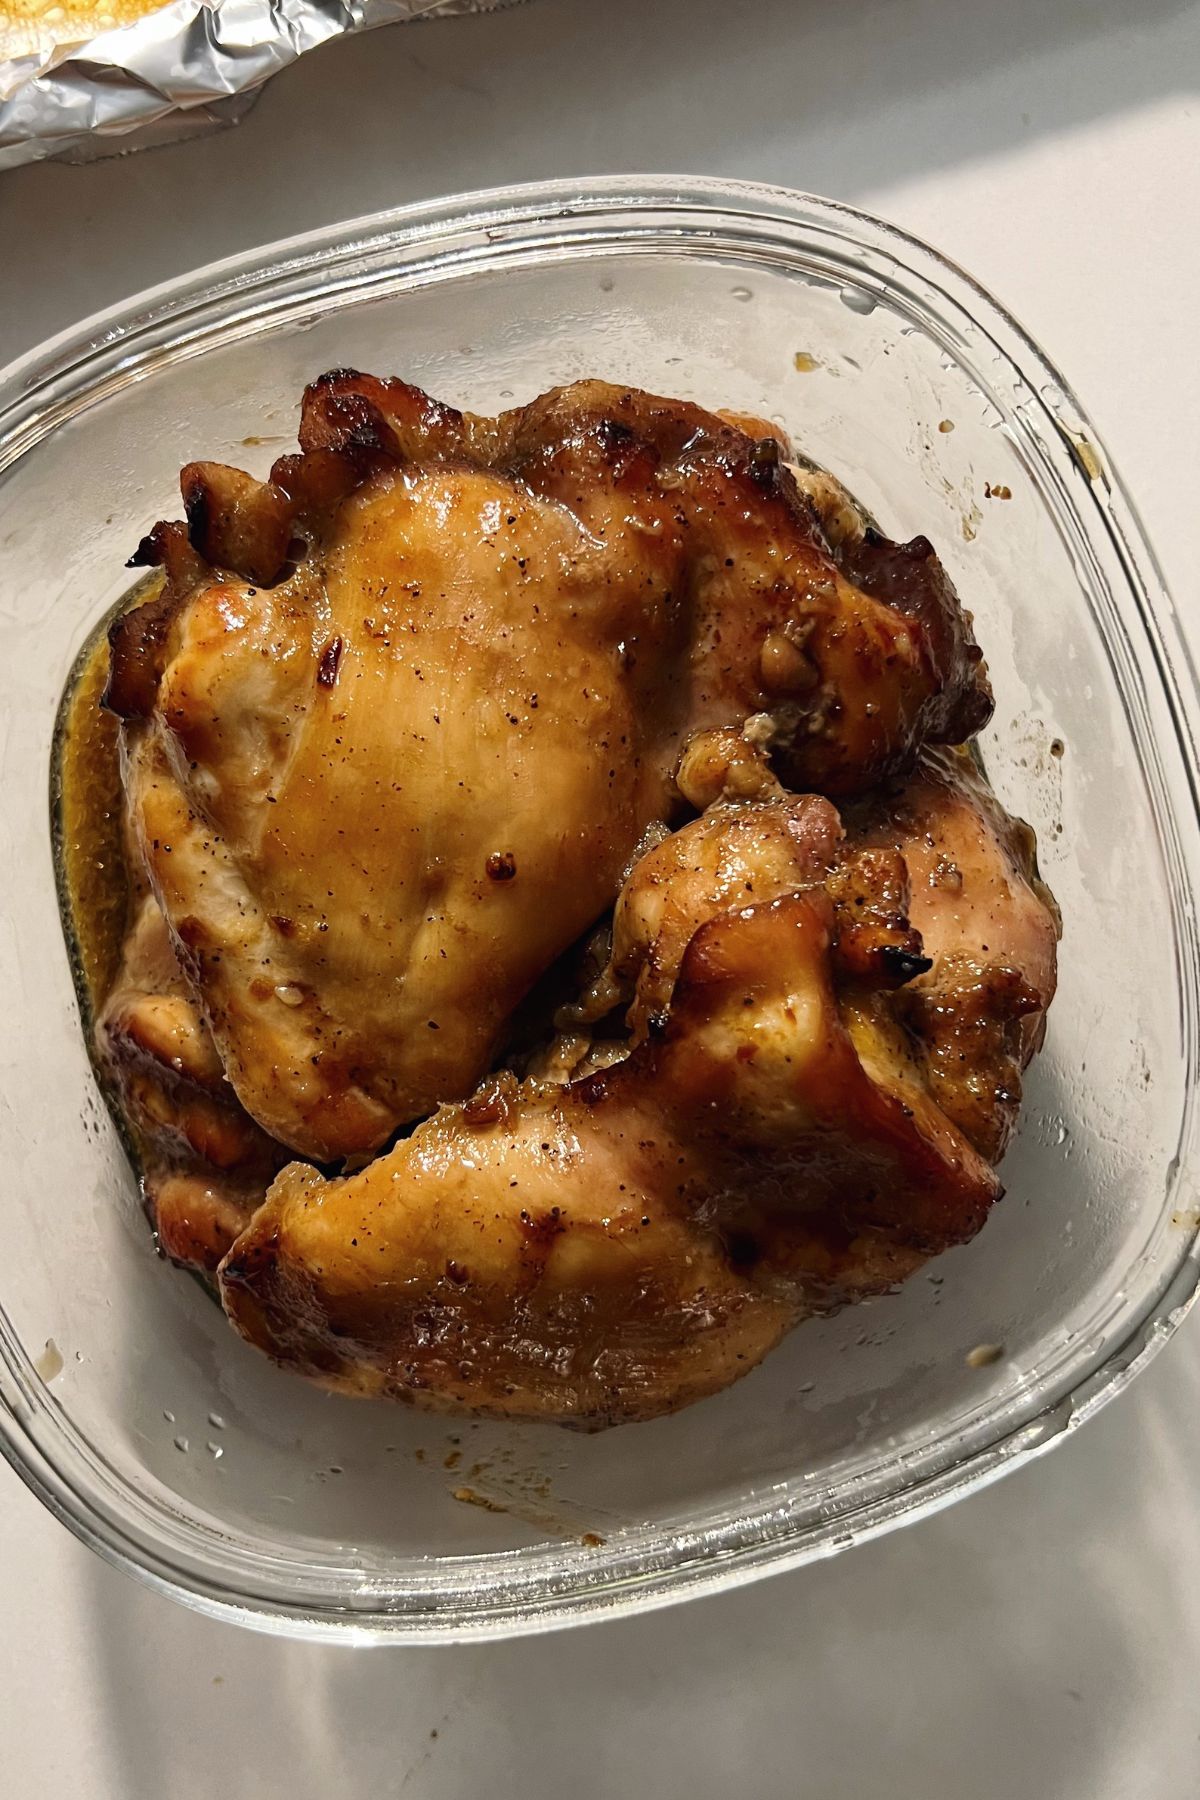
Oven Baked + Broil Method:
- Preheat the oven to 400°F (200°C). Line a baking sheet with aluminum foil and lightly grease it.
- Place the marinated chicken pieces on the baking sheet in a single layer.
- Bake for 20-25 minutes, or until the chicken is fully cooked.
- Switch the oven to broil on high. Broil the chicken for 2-3 minutes, or until the top is caramelized and slightly crispy.
- Remove from the oven and let rest for a few minutes before serving.
Grill Method:
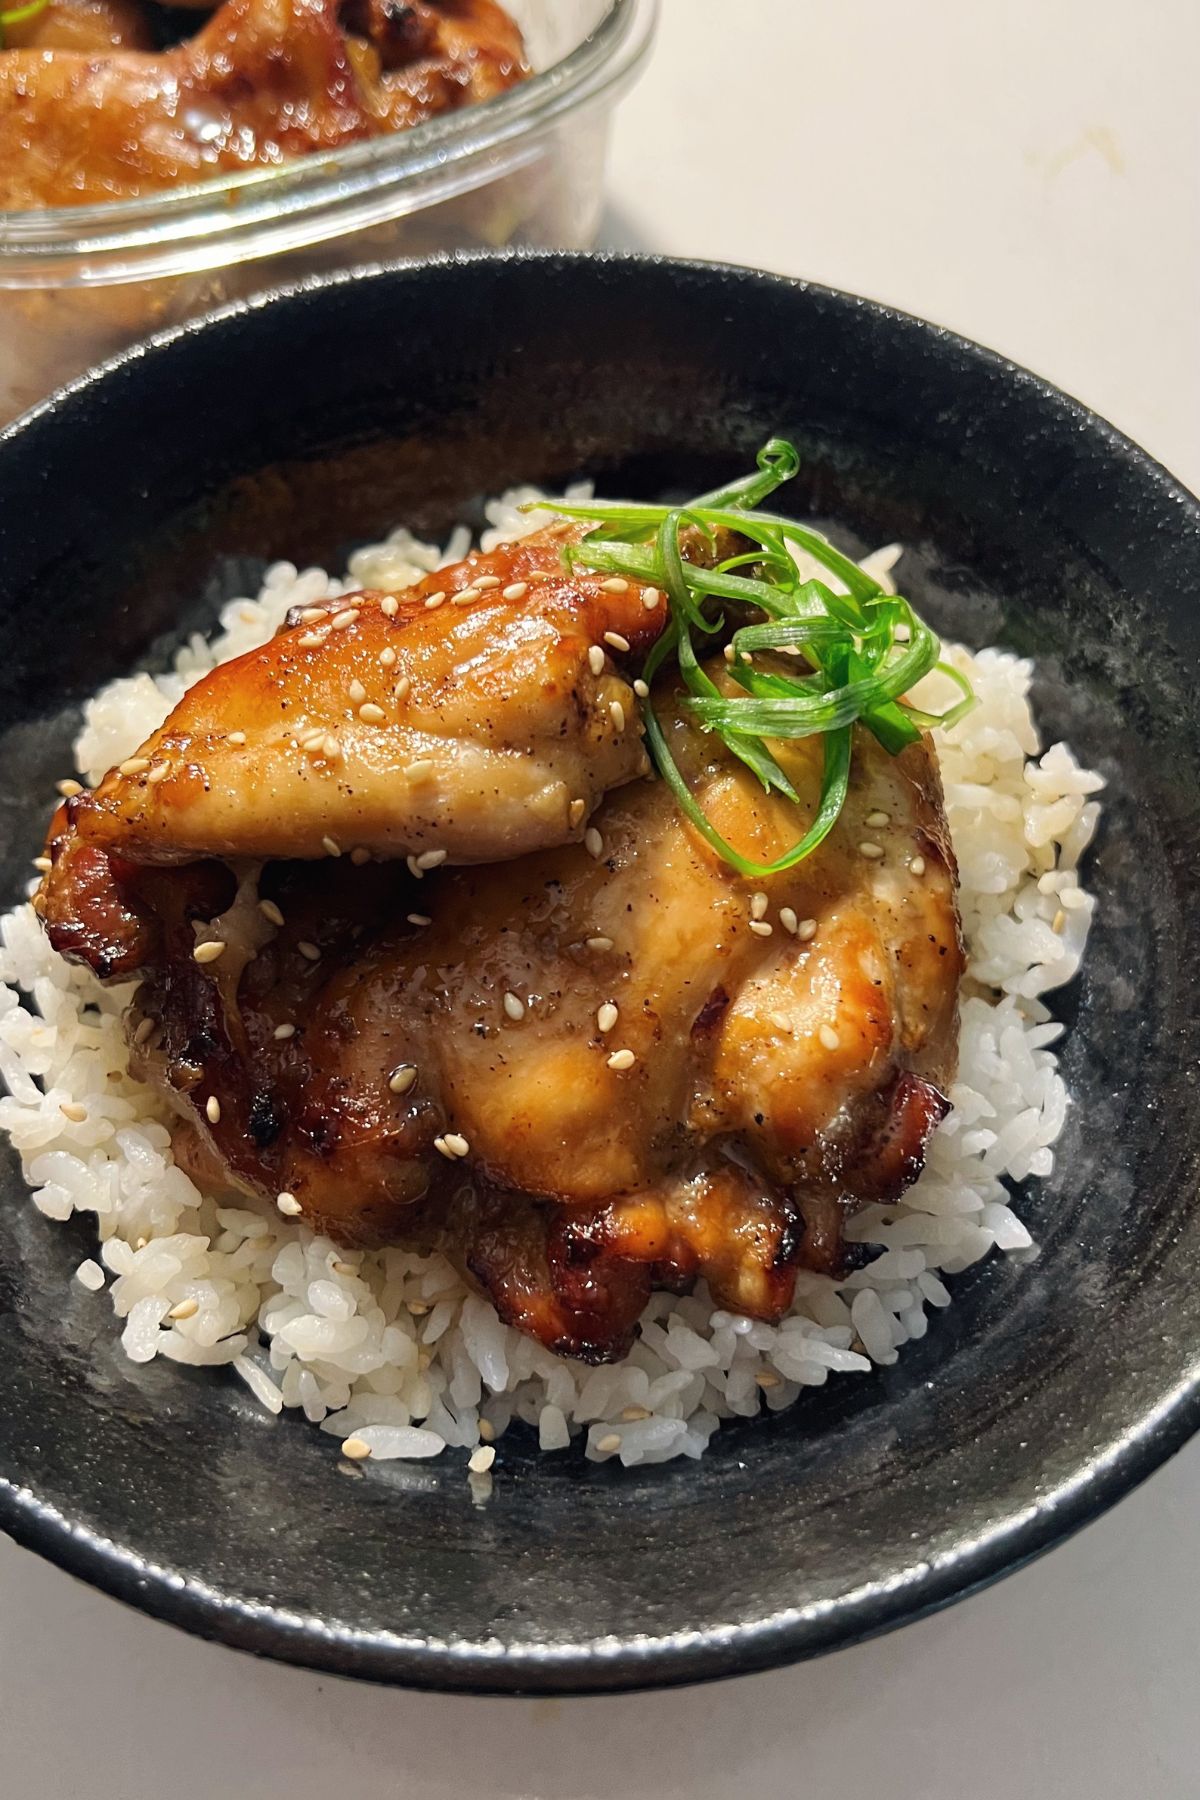
Serving:
- Serve the bulgogi chicken with steamed rice and vegetables of choice.
- Garnish with additional chopped green onions and sesame seeds if desired.
- Enjoy with lettuce wraps, kimchi, and other Korean side dishes for a complete meal.
- Prep Time: 2 hours
- Cook Time: 15 minutes
- Category: Entree
- Method: Air Fry
- Cuisine: Korean
Okonomi Kitchen is a participant in the Amazon Services LLC Associates Program. When you purchase something through my amazon affiliate links, I earn a small commission that helps me produce consistent content at no cost to you. Thank you for your support!